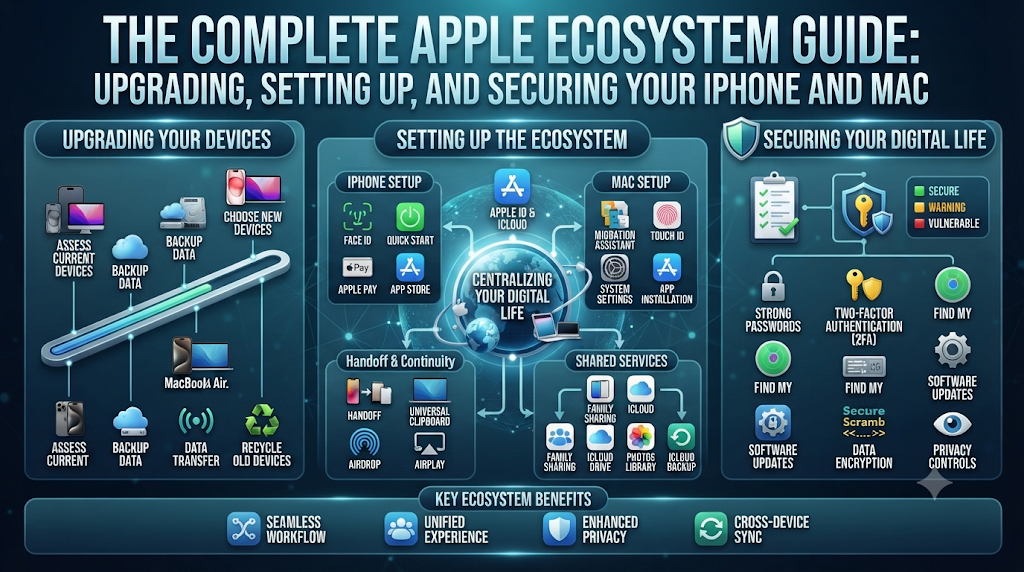
Managing an Apple device works best when you follow a clear, step-by-step routine from the day you unbox it through every major software release. Whether you are checking iOS 27 compatible iPhones, configuring a brand-new handset, or protecting your personal files on a Mac, understanding how Apple’s core tools fit together saves time and prevents data loss. On Osnivo, our goal is to help everyday users navigate these steps without technical guesswork.
This guide walks you through the entire Apple ownership lifecycle in plain English. You will learn how to check hardware compatibility, decide when to install major updates, set up a new iPhone from scratch or from an Android phone, configure essential privacy controls, fix common Wi-Fi dropouts, and record your screen on macOS.
Understanding Apple’s Ecosystem and Operating Systems
Before changing settings or installing updates, it helps to understand how Apple organizes its software. Each device category runs a dedicated operating system designed for its screen size, processor, and input methods:
- iOS: Powers the iPhone, handling touch navigation, cellular connectivity, apps, and mobile security.
- iPadOS: Runs on the iPad, adding multi-window multitasking and Apple Pencil support to the mobile foundation.
- macOS: Powers MacBook laptops and desktop Macs, built for keyboard-and-trackpad productivity and full desktop software.
- watchOS, tvOS, and visionOS: Operate Apple Watch, Apple TV, and Apple Vision Pro respectively, syncing seamlessly through your Apple Account (formerly called Apple ID).
Your Apple Account acts as the digital bridge across all these devices. When you sign in on an iPhone and a Mac using the same account, your contacts, photos, passwords, and backups stay synchronized automatically through iCloud, Apple’s cloud storage service.
Checking Hardware Support: iOS 27 and macOS 27 Compatibility
Every autumn, Apple releases major versions of its mobile and desktop operating systems. Newer software introduces updated security patches, interface refinements, and advanced features, including Apple Intelligence tools that require modern neural processing hardware. Because older chips lack the speed and memory needed for modern tasks, Apple eventually retires older models from major OS upgrades.
Checking iOS 27 Compatible iPhones
Before downloading a major mobile update, verify that your hardware appears on Apple’s official list of iOS 27 compatible iPhones. Compatibility depends on the internal system-on-a-chip (such as Apple’s A-series processors) rather than storage capacity or screen size.
To check your exact iPhone model:
- Open the Settings app on your iPhone.
- Tap General, then tap About.
- Look at the Model Name line to see your exact device generation.
Keep in mind that operating system compatibility differs from individual feature compatibility. An older supported iPhone may install the latest iOS release and receive vital security fixes, yet omit hardware-dependent capabilities like advanced on-device AI processing or specialized camera modes.
Checking macOS 27 Compatible Macs
Desktop and laptop computers follow a similar hardware rule. Reviewing the list of macOS 27 compatible Macs ensures your MacBook Air, MacBook Pro, iMac, Mac mini, or Mac Studio can run the newest desktop architecture smoothly. In recent years, Apple has focused heavily on Apple silicon chips (M1, M2, M3, M4, and newer), phasing out older Intel-based Macs.
To check your Mac model:
- Click the Apple menu in the top-left corner of your screen.
- Select About This Mac.
- Review the chip name, memory (RAM), and current macOS version displayed in the overview window.
| Compatibility Factor | What It Determines | Where to Verify on Device |
| Processor / Chip | Whether your device can install the major OS release | Settings > General > About (iPhone) or About This Mac |
| Available Storage | Whether the installer has room to download and unpack | Settings > General > iPhone Storage or System Settings > General > Storage |
| Neural Engine / RAM | Whether Apple Intelligence and heavy multitasking features work | Apple technical specifications for your exact model year |
Should I Update to iOS 27 Right Away?
Whenever a major release arrives, many users ask: should I update to iOS 27 on day one, or wait? The right choice depends on how you use your phone and whether you rely on specialized apps for work or school.
Reasons to Update Promptly
- Security Protection: Major updates close newly discovered software vulnerabilities and strengthen system defenses against malware and phishing.
- App Compatibility: Banking, messaging, and workplace apps quickly adopt new software tools and eventually require recent iOS versions.
- Bug Fixes and Features: You gain access to the newest battery management, messaging improvements, and accessibility tools.
Reasons to Wait a Few Days
- Early Point-Release Bugs: Initial
.0releases occasionally have minor battery drain or Bluetooth quirks that Apple resolves in.0.1or.1updates within two to three weeks. - Enterprise or Legacy Apps: If you use specialized corporate or university software, verify with your IT team that those apps run smoothly on the new version first.
Practical Rule: If your iPhone is your primary work device, back up your data, wait one to two weeks for the first stability patch, and then install the update.
How to Back Up an iPhone Before Making Major Changes
Never install a major software update, repair a device, or switch phones without a verified backup. Learning how to back up an iPhone protects your photos, messages, app data, and settings if an update stalls or your phone is lost. Apple gives you two reliable methods.
Method 1: Wireless Backup via iCloud
An iCloud backup runs automatically over Wi-Fi while your iPhone is locked and connected to power.
- Connect your iPhone to a stable Wi-Fi network.
- Open Settings and tap your name at the very top.
- Tap iCloud, then select iCloud Backup.
- Turn on Back Up This iPhone if it is disabled.
- Tap Back Up Now and stay on Wi-Fi until the progress bar finishes.
Note: Apple includes 5 GB of free iCloud storage, which fills up quickly if you have many photos. For larger libraries, you may need an iCloud+ storage plan or a computer backup.
Method 2: Local Encrypted Backup via Mac or PC
A local computer backup stores a complete copy of your iPhone on your Mac or Windows PC’s hard drive.
- Connect your iPhone to your Mac using a USB-C or Lightning cable.
- Open Finder on macOS (or the Apple Devices app on Windows) and select your iPhone in the left sidebar.
- Under the General tab, select Back up all of the data on your iPhone to this Mac.
- Check Encrypt local backup and create a memorable password—this ensures saved passwords, Health data, and Wi-Fi credentials are included.
- Click Back Up Now and wait for the sync to complete.
How to Set Up a New iPhone Step by Step
Unboxing a new device is straightforward when you prepare your old phone and Wi-Fi password beforehand. Follow this sequence for how to set up a new iPhone cleanly without losing your personal data:
- Power On and Choose Language: Press and hold the side button until the Apple logo appears, then select your language and country.
- Use Quick Start (If Upgrading from an Older iPhone): Place your current iPhone next to the new one. When the Set Up New iPhone prompt appears on your old screen, tap Continue and scan the animated pattern with your old phone’s camera.
- Connect to Wi-Fi: Select your home Wi-Fi network and enter the password so the phone can activate.
- Configure Face ID or Touch ID and a Passcode: Follow the on-screen prompts to register your face or fingerprint, then set a strong 6-digit (or alphanumeric) passcode.
- Restore or Transfer Your Data: Choose Transfer from iPhone for a direct device-to-device wireless transfer, or select Download from iCloud if you prefer restoring from a recent cloud backup.
- Sign In to Your Apple Account: Enter your Apple Account email and password to activate iMessage, FaceTime, Find My, and the App Store.
- Review Location and Analytics Prompts: Choose whether to enable Location Services and Siri, knowing you can adjust every toggle later in Settings.
How to Transfer Data from Android to iPhone
Switching mobile platforms does not mean leaving your photos, contacts, or message history behind. Apple provides a free, official utility called Move to iOS to transfer data from Android to iPhone securely over a private Wi-Fi connection.
What You Need Before Starting
- Both phones plugged into power.
- Wi-Fi enabled on your Android phone.
- The Move to iOS app installed on your Android device from the Google Play Store.
- Enough storage space on your new iPhone to hold your Android photos, videos, and files.
Step-by-Step Migration Process
- Turn on your new iPhone and follow the initial setup screens until you reach the Transfer Your Apps & Data screen.
- Tap From Android. A six-digit or ten-digit one-time code will appear on your iPhone screen.
- Open the Move to iOS app on your Android phone, accept the terms, and enter the code displayed on the iPhone.
- Your iPhone will create a temporary private Wi-Fi network. Tap Connect on your Android device when prompted.
- Select the content you want to move—such as Contacts, Message History, Camera Roll photos, Google Account, and WhatsApp chats—then tap Continue.
- Leave both phones untouched until the loading bar finishes on the iPhone screen, then tap Done on Android and complete the remaining iPhone setup steps.
Important Precaution: Paid apps purchased on the Google Play Store do not transfer automatically; you will need to download their iOS versions from the Apple App Store.
Essential iPhone Settings Guide for Daily Efficiency
Out of the box, iOS uses default settings designed for broad compatibility rather than personal efficiency. Use this iPhone settings guide right after setup to optimize battery life, display comfort, and notifications:
- Display & Brightness: Go to Settings > Display & Brightness and turn on Auto-Brightness (under Settings > Accessibility > Display & Text Size) and True Tone so the screen adapts to ambient lighting and saves battery.
- Control Center Customization: Swipe down from the top-right corner of the screen to open Control Center, tap the + icon in the top-left corner, and add quick toggles you actually use, such as Low Power Mode, Screen Recording, or Shazam.
- Notification Summary: Open Settings > Notifications > Scheduled Summary to bundle non-urgent promotional and social alerts into two daily digests instead of letting them interrupt your focus all day.
- Background App Refresh: Navigate to Settings > General > Background App Refresh and restrict background data updates to Wi-Fi or disable them for rarely used apps to preserve mobile data and battery longevity.
- Default Browser and Mail App: Open Settings > Apps > Default Apps to choose your preferred web browser or email client if you use third-party tools alongside Safari and Apple Mail.
iPhone Security Settings Checklist
Protecting your iPhone safeguards far more than text messages—it protects banking apps, two-factor authentication codes, private photos, and saved passwords. Work through this iPhone security settings checklist to lock down your device against theft and unauthorized access:
- Enable Stolen Device Protection: Go to Settings > Face ID & Passcode, enter your passcode, scroll down, and turn on Stolen Device Protection. This requires biometric authentication (Face ID or Touch ID) with no passcode fallback before anyone can change your Apple Account password or view saved passwords when away from familiar locations.
- Verify Find My iPhone: Open Settings > [Your Name] > Find My > Find My iPhone and ensure Find My iPhone, Find My network, and Send Last Location are all toggled on.
- Turn On Two-Factor Authentication: Check Settings > [Your Name] > Sign-In & Security to confirm Two-Factor Authentication is active on your Apple Account.
- Review App Tracking and Location Permissions: Visit Settings > Privacy & Security > Tracking and disable Allow Apps to Request to Track. Then open Location Services on the same screen and set most apps to While Using the App rather than Always.
- Hide Lock Screen Previews: Go to Settings > Notifications > Show Previews and select When Unlocked so sensitive verification codes and messages never appear on a locked screen.
- Enable Automatic Security Updates: Open Settings > General > Software Update > Automatic Updates and turn on Security Responses & System Files so urgent patches install promptly.
Troubleshooting When an iPhone Won’t Connect to Wi-Fi
Wireless dropouts are one of the most common frustrations for mobile users. If your iPhone won’t connect to Wi-Fi, work through these troubleshooting steps in order—starting with harmless checks before resetting any network settings.
Step 1: Check Basic Toggles and Router Power
- Open Settings > Wi-Fi and confirm the Wi-Fi switch is green. Make sure Airplane Mode is turned off.
- Move closer to your wireless router and test whether another device (like a laptop or tablet) can load a webpage on the same network.
- Unplug your Wi-Fi router from power for 30 seconds, plug it back in, and wait two minutes for it to reboot.
Step 2: Forget and Rejoin the Network
Corrupted saved network credentials often block connections after a router firmware update or password change.
- Go to Settings > Wi-Fi.
- Tap the blue i (Info) button next to your network name.
- Tap Forget This Network, then tap Forget to confirm.
- Select the network again from the list and carefully re-enter the Wi-Fi password.
Step 3: Check VPNs and Private Wi-Fi Address
Third-party VPN apps sometimes block local traffic when a connection drops. Open Settings > General > VPN & Device Management and temporarily disconnect any active VPN profile to test if internet access returns.
Step 4: Reset Network Settings (Last Software Resort)
If your iPhone still refuses to connect across multiple Wi-Fi networks, reset your network configuration:
- Open Settings > General > Transfer or Reset iPhone.
- Tap Reset, then select Reset Network Settings.
- Enter your passcode to confirm.
Warning: This action does not erase your photos, messages, or apps, but it clears all saved Wi-Fi passwords, Bluetooth pairings, and custom VPN configurations. You will need to re-enter your Wi-Fi passwords afterward. If hardware Wi-Fi toggles remain grayed out after a reset, contact Apple Support for a hardware diagnostic.
How to Use QuickTime Player Screen Recording on Mac
Whether you are creating a tutorial for a coworker, documenting a software bug, or saving a lecture, learning QuickTime Player screen recording Mac workflows gives you crisp video without installing third-party software. QuickTime Player comes pre-installed on every Mac.
Step-by-Step Screen Recording Instructions
- Open QuickTime Player from your Applications folder or by pressing Command + Space, typing
QuickTime Player, and pressing Return. - In the top menu bar, click File > New Screen Recording (or press Control + Command + N).
- In the on-screen toolbar, choose whether to capture the Entire Screen or a Selected Portion (drag the dotted frame over the exact window or area you want to record).
- Click Options in the toolbar to pick where the finished video saves (such as Desktop or Documents) and choose a Microphone if you want to narrate your screen actions.
- Click Record to start capturing.
- When finished, click the circular Stop button in the top-right menu bar (or press Command + Control + Esc). QuickTime will immediately open your finished
.movvideo so you can trim or share it.
Common Apple Device Mistakes to Avoid
Even experienced users occasionally run into preventable issues. Watch out for these frequent habits:
- Skipping Backups Before Major Upgrades: Installing a major iOS or macOS update with less than 15% free storage and no recent backup risks data loss if the installation encounters an error.
- Using the Same Passcode Everywhere: Reusing an obvious PIN (like
123456or a birth year) weakens every security feature on your iPhone, including Apple Pay and saved passwords. - Installing Unverified Configuration Profiles: Never install unknown configuration profiles or third-party app stores sent via text messages or pop-up ads, as they can bypass built-in iOS security protections.
- Confusing Storage with iCloud: Deleting photos from your iPhone while iCloud Photos is turned on removes them from iCloud and all synced devices too—always verify where files live before deleting them.
Helpful Osnivo Tools for Your Apple Devices
When you want quick answers tailored to your exact device model, Osnivo provides practical utilities designed around real Apple ownership tasks:
- Compatibility Checker & Version Compare: Verify whether your iPhone, iPad, or Mac supports upcoming operating system releases and compare key differences across software versions before upgrading.
- Update Readiness Checker & Should I Update Tool: Review storage space, backup status, and stability considerations before installing major iOS or macOS updates.
- Setup Companion & Migration Planner: Follow structured checklists for unboxing a new iPhone or moving personal data smoothly from Android or an older Apple device.
- Settings Pathfinder & Security Checkups: Locate specific iOS and macOS menus quickly and audit your privacy, Find My, and account protection toggles.
- Osnivo Fix & Backup Planning Resources: Work through step-by-step troubleshooting trees for Wi-Fi, battery, and sync errors, or join the Community Q&A Forum when you need advice on an unusual issue.
Frequently Asked Questions (FAQs)
1. How do I check if my phone is on the iOS 27 compatible iPhones list?
Open Settings > General > About on your iPhone to check your Model Name. Compare that exact model against Apple’s official supported device list or Osnivo’s Compatibility Checker before downloading the update.
2. Should I update to iOS 27 as soon as it comes out?
If you want the latest security patches right away, updating immediately is safe after creating a full backup. If you rely on specialized work or banking apps, waiting one to two weeks for Apple’s first .0.1 or .1 bug-fix update is a smart precaution.
3. What is the safest way for how to back up an iPhone?
For maximum safety, use both methods: keep automatic daily iCloud Backups enabled over Wi-Fi, and create an encrypted local backup on your Mac or PC before major software updates or international travel.
4. How long does it take to set up a new iPhone using Quick Start?
Device-to-device wireless transfers typically take between 15 and 60 minutes, depending on how many gigabytes of photos, videos, and apps you are moving and the speed of your Wi-Fi network.
5. Can I transfer data from Android to iPhone after I already finished setting up my iPhone?
Apple’s Move to iOS app only works during the initial iPhone setup assistant. If you already completed setup, you would need to erase the iPhone (Settings > General > Transfer or Reset iPhone > Erase All Content and Settings) to run Move to iOS, or transfer items manually using Google Drive and Google Photos.
6. Why does my iPhone say “No Internet Connection” even when connected to Wi-Fi?
This usually means your iPhone successfully reached your wireless router, but the router itself has lost its connection to your internet service provider. Restarting your modem and router resolves this in most cases.
7. Where can I find macOS 27 compatible Macs information on my computer?
Click the Apple menu in the top-left corner of your Mac screen and select About This Mac. Note your Mac’s chip type and model year, then match it against Apple’s official macOS compatibility specifications.
8. What is the single most important item on an iPhone security settings checklist?
Turning on Stolen Device Protection (Settings > Face ID & Passcode) alongside Two-Factor Authentication provides the strongest defense against unauthorized account takeovers if your phone is lost or stolen.
9. Does QuickTime Player screen recording on Mac capture internal system audio?
By default, QuickTime Player records external audio through your Mac’s built-in or connected microphone. Capturing internal app audio directly requires configuring a virtual audio routing utility in macOS Audio MIDI Setup.
10. Will resetting network settings delete my photos or contacts?
No. Selecting Reset Network Settings only clears saved Wi-Fi passwords, preferred networks, Bluetooth pairings, and VPN settings. Your photos, messages, apps, and Apple Account data remain untouched.
Conclusion
Taking care of your Apple devices does not require deep technical expertise—it simply requires following the right sequence. Confirming hardware compatibility before upgrading, maintaining regular encrypted or iCloud backups, configuring strong security protections like Stolen Device Protection, and knowing how to troubleshoot basic Wi-Fi issues keep your iPhone and Mac running reliably every day.
As your next practical step, check your device’s current backup status in Settings and review your privacy toggles using the checklist above. Whenever you are preparing for a software upgrade, switching devices, or troubleshooting a setting, explore the interactive guides and utilities on Osnivo to make every step clear and predictable.