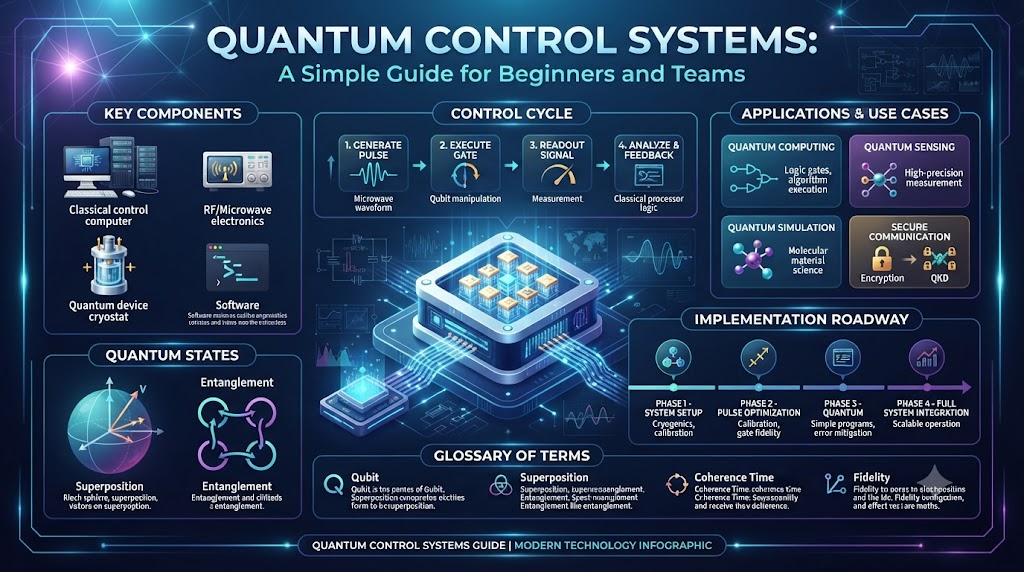
Your qubit gave great results yesterday. Today the same circuit fails. You did not change a single line of code. So what changed?
Most of the time, the answer sits in the control system. A quantum control system sends tiny signals to qubits and reads their answers. Think of a conductor and an orchestra. The qubits play the notes. The control system keeps the time.
Small errors in those signals grow into big errors in your results. Teams that ignore this layer lose weeks chasing the wrong problem. Teams that understand it fix problems in hours.
This guide explains quantum control in plain words. You will learn the main parts, how pulses work, and why calibration matters. You will also see common mistakes and a 10-step roadmap. At QuantumOpsSchool.com, we teach quantum operations the same way: simple, practical, and focused on real work. You do not need a physics degree. You only need patience and a few clear ideas.
What Is a Quantum Control System?
A quantum control system is the hardware and software that sends exact signals to qubits, reads their state, and keeps them working correctly.
That is the short answer. Now let us unpack it.
A qubit is fragile. You cannot flip it with a simple switch. You must nudge it with a carefully shaped signal. For superconducting qubits, that signal is a microwave pulse. For trapped ions, it is often a laser. For spin qubits, it is a mix of magnetic and electric signals.
The tools differ, but the job stays the same. The control system does three things:
- It drives the qubit to a new state.
- It reads the qubit to get an answer.
- It corrects errors before they spread.
Every quantum program you run turns into these three actions. The control system does the real work behind each gate.
Why Control Matters More Than Most People Think
Here is a quick math lesson. Say your gate works 99% of the time. That sounds great.
Now run 100 gates in a row. Your chance of getting a clean result drops to about 37%. If your gate works 99.9% of the time, the same circuit succeeds about 90% of the time. That tiny gap changes everything.
So better control gives you better results. It also lets you run longer circuits. Long circuits are where useful quantum work happens.
Control also affects cost. A lab that wastes hours on bad calibration wastes expensive fridge time. Cloud users feel it too. Their jobs fail more often when the provider’s control layer drifts.
Because of this, many experts say control is the quiet bottleneck of quantum computing. Better qubits help. Better control helps just as much.
The Main Parts of a Quantum Control Stack
A control stack has many layers. Each layer has one clear job. The table below shows the key parts in a typical superconducting setup.
| Part | Its Job | Simple Way to Think About It |
|---|---|---|
| Waveform generator | Makes the pulse shape | A pen that draws the signal |
| Mixer and up-converter | Moves the signal to the qubit’s frequency | A radio tuner |
| Cables, filters, attenuators | Carry signals and cut noise | A quiet pipe for the signal |
| Cryostat (dilution fridge) | Keeps qubits near 10–20 millikelvin | A deep freezer |
| Readout chain | Turns a faint signal into a 0 or 1 | A very sensitive microphone |
| Real-time controller (often an FPGA) | Makes fast decisions in nanoseconds | A quick-thinking assistant |
| Software stack | Turns circuits into pulses | A translator |
Each part can fail on its own. A loose cable adds noise. A warm filter lets heat leak in. A slow controller misses its timing window.
So you must treat the stack as one system. A weak link anywhere hurts the whole chain.
How a Control Pulse Works
Every qubit has its own natural frequency. To change its state, you send a pulse at that same frequency. Physicists call this driving the qubit.
Two things decide what the pulse does: its strength and its length. Together, they set how far the qubit rotates.
A “pi pulse” flips the qubit from 0 to 1. A “pi over two pulse” puts it halfway, in a superposition. Most gates are built from these simple moves.
Pulse shape matters too. A sharp, square pulse leaks energy into other energy levels. That leak is called leakage, and it ruins your result. So engineers use smooth shapes, such as a Gaussian curve.
Some teams add a trick called DRAG. It adds a small correction to the pulse. This correction cuts leakage and keeps the gate clean. You do not need to master the math first. Just know that pulse shape is a real design choice.
Open-Loop vs Closed-Loop Control
Control systems come in two main styles. Open-loop control sends a pulse and moves on. Closed-loop control sends a pulse, checks the result, and adjusts.
| Feature | Open-Loop Control | Closed-Loop Control |
|---|---|---|
| How it works | Sends a fixed pulse plan | Measures, then changes the next step |
| Speed | Very simple and fast | Needs fast measurement and decisions |
| Handles drift | Poorly | Well |
| Best use | Short, stable experiments | Error correction and long runs |
| Main risk | Small errors pile up | Slow feedback breaks the loop |
Open-loop control works fine for short tests. But real quantum computers need feedback. Error correction, for example, must measure and react while the qubits still hold their state.
That need creates a hard timing problem. Feedback must finish before the qubit loses its information. This is why teams use FPGAs and custom chips close to the fridge. Every nanosecond counts.
Calibration: The Daily Chore That Saves Your Results
Qubits drift. Their frequency shifts a little. Their best pulse strength changes. Their readout settings go stale.
Calibration fixes this. It is a set of small tests that find the best settings again. Here are the most common ones:
- Spectroscopy finds the qubit’s true frequency.
- Rabi test finds the right pulse strength for a flip.
- Ramsey test fine-tunes the frequency and checks phase drift.
- T1 test measures how long the qubit holds energy.
- Readout tuning sets the line between a 0 and a 1.
Good teams automate this work. A script runs the tests, checks the numbers, and updates the settings. It also flags a qubit that looks unhealthy.
How often should you run it? Many labs run quick checks every few hours and a full set each day. Your own schedule depends on how stable your hardware is.
Noise, Crosstalk, and Drift
Noise is any unwanted signal. It comes from many places. Electronics add a little. Heat adds a little. Even a nearby pump can add some.
Crosstalk is a special problem. A pulse meant for one qubit also nudges its neighbors. As chips grow bigger, this gets worse. Engineers fight it with careful chip layout, smart pulse timing, and extra correction pulses.
Timing jitter is another quiet enemy. If a pulse arrives a few nanoseconds late, the gate changes. So every clock in the system must stay in sync.
Drift is slow change over time. It hides well because each day looks almost the same. Then, after a week, results fall off a cliff.
The fix is steady tracking. Log your key numbers every day. Plot them. A slow slide shows up quickly on a simple chart.
Control Across Different Qubit Types
Each qubit type needs its own style of control. The table gives a quick view.
| Qubit Type | Main Control Signal | Typical Gate Speed |
|---|---|---|
| Superconducting | Microwave pulses | Tens of nanoseconds |
| Trapped ion | Lasers or microwaves | Microseconds |
| Neutral atom | Laser pulses | Sub-microsecond to microseconds |
| Spin qubit | Microwave and electric pulses | Tens to hundreds of nanoseconds |
Faster gates are not always better. Slow gates can be very precise. Fast gates leave less time for noise. Each design trades speed for accuracy in its own way.
The big ideas still carry across all types. You drive, read, and correct. You calibrate often. You watch for drift. Once you learn the basics on one platform, the next one feels much easier.
Real-World Stories: When Control Systems Break (Case Studies)
These are common scenarios that teams report in labs and cloud setups. Each one shows how a small control issue creates a big problem.
- The warm cable: A lab saw sudden noise in one qubit. A cable had slipped and carried extra heat. The team re-seated it and results returned within a day.
- The silent drift: A team’s gate quality fell slowly over two weeks. No alarm fired. A simple daily chart later showed a steady frequency shift.
- The late pulse: A new firmware update changed pulse timing by a few nanoseconds. Two-qubit gates failed. Rolling back the update fixed it.
- The crowded neighbor: Pulses on one qubit disturbed its neighbor. The team added a small correction pulse and cut the error sharply.
- The stale readout line: Readout settings stayed fixed for a month. The line between 0 and 1 had moved. Fresh tuning raised accuracy at once.
- The ground loop: A hum in the lab entered the signal path. Better grounding removed the hum and cleaned the results.
- The slow feedback: A team built error correction but their decision step ran too slowly. They moved the logic onto an FPGA and the loop worked.
- The overheated amplifier: An amplifier ran too hot and added noise to readout. Lowering its power brought the noise back down.
- The copy-paste setting: An engineer copied settings from one qubit to another. Each qubit differs, so gates failed. Per-qubit calibration solved it.
- The lost log: A team lacked records of past calibration values. They could not find when drift began. They now save every run.
Common Mistakes and Pitfalls
Even skilled teams repeat these errors. Here is what goes wrong and how to fix it.
- Skipping calibration. Settings go stale and gates degrade. Fix: Automate calibration and run it on a schedule.
- Trusting one number. A single fidelity score hides real problems. Fix: Track many numbers, such as T1, readout error, and gate error.
- Ignoring timing. A tiny delay breaks gates. Fix: Check clock sync and pulse timing after every change.
- Copying settings between qubits. Each qubit has its own traits. Fix: Calibrate each one on its own.
- Using sharp pulses. Square pulses cause leakage. Fix: Use smooth shapes and test correction methods like DRAG.
- Forgetting crosstalk. Neighbors disturb each other. Fix: Test pairs of qubits together, not only alone.
- Changing many things at once. You cannot tell what helped. Fix: Change one setting, test, then move on.
- Keeping no logs. You cannot trace drift without history. Fix: Save every calibration result with a date.
- Building slow feedback loops. Late decisions arrive after the qubit has failed. Fix: Put fast logic near the hardware.
- Treating control as “someone else’s job.” Software and hardware teams then blame each other. Fix: Share one view of the full stack.
Step-by-Step Implementation Roadmap
Use these ten steps to build or improve a control workflow. Follow them in order.
- Define your goal. Decide what you want: a demo, a research test, or a steady service.
- Learn the basics. Understand qubits, pulses, and noise in plain terms before touching hardware.
- Map your stack. List every part from software to fridge. Name an owner for each one.
- Start in simulation. Test pulse ideas with a tool such as QuTiP before you use real hardware.
- Set up clean signal paths. Check cables, filters, grounding, and clock sync.
- Run basic calibration. Find qubit frequency, pulse strength, and readout settings.
- Measure your baseline. Record gate error, T1, T2, and readout error for each qubit.
- Automate the routine. Write scripts that calibrate, check, and log on a schedule.
- Add feedback. Begin with simple measure-and-adjust steps. Then move toward faster, real-time loops.
- Review and improve. Look at your charts each week. Fix the weakest link first and repeat.
10 Detailed FAQs
1. What does a quantum control system do each day?
It sends pulses to qubits, reads their results, and runs calibration checks. It also logs key numbers. Each day, it works like a quiet operator that keeps the machine ready for your jobs.
2. Is quantum control the same as quantum error correction?
No. Control sends the signals that run gates and readouts. Error correction is a method that uses many qubits to find and fix mistakes. Error correction needs strong, fast control to work.
3. Why do qubits need microwave pulses?
A superconducting qubit has energy levels set by its design. A microwave pulse at the matching frequency moves it between those levels. The pulse acts like a precise push on a swing.
4. What is a pi pulse?
A pi pulse flips a qubit from 0 to 1, or from 1 to 0. Its strength and length are set so the qubit rotates exactly half a turn. Teams find the right values through a Rabi test.
5. How often should I calibrate my qubits?
It depends on your hardware. Many labs run quick checks every few hours and full routines daily. Watch your tracked numbers. If they drift fast, calibrate more often.
6. What is control latency and why does it matter?
Latency is the delay between a measurement and the next action. Qubits lose information quickly. So feedback must finish fast, or the correction arrives too late to help.
7. Can I learn quantum control without a physics degree?
Yes. Start with simple ideas: qubits, pulses, noise, and calibration. Add basic electronics and Python skills. Hands-on practice with simulators builds understanding faster than theory alone.
8. What software helps with pulse-level work?
Simulators such as QuTiP let you test how pulses affect a qubit. Many hardware vendors also ship their own control software. Pick tools that match your platform and let you log results.
9. How does control knowledge help cloud users?
Cloud users often see error numbers and queue changes. Control basics help you read those numbers. You can pick better qubits, plan around calibration times, and spot why a job failed.
10. What is crosstalk in a quantum chip?
Crosstalk happens when a signal meant for one qubit also affects its neighbors. It grows as chips get denser. Teams cut it with smart layout, careful timing, and correction pulses.
Final Recommendation and Next Steps
Start small and stay steady. You do not need a full lab to learn quantum control. A simulator, a notebook, and a clear plan will take you far. Run simple pulse tests first and watch how the qubit responds.
Next, build the habit of tracking numbers. Save your calibration results every day. Plot them each week. Slow drift is the most common hidden problem, and a plain chart catches it early.
Then, treat the whole stack as one system. Software, electronics, and the fridge all shape your results. When something fails, check each layer in turn. Do not blame the qubit first.
If you work on a team, share the same map of the stack. Give each part an owner. Write down your settings and your changes. Clear notes turn confusing failures into quick fixes.
Finally, grow your skills in layers. Learn the basics, then calibration, then feedback. Each layer makes the next one easier. Use the ten-step roadmap above as your checklist, and review it every month.
Quantum computers will keep improving. Better control will drive much of that progress. If you master the basics now, you will stand ready for the next wave of tools and hardware. Pick one step from the roadmap today and do it.